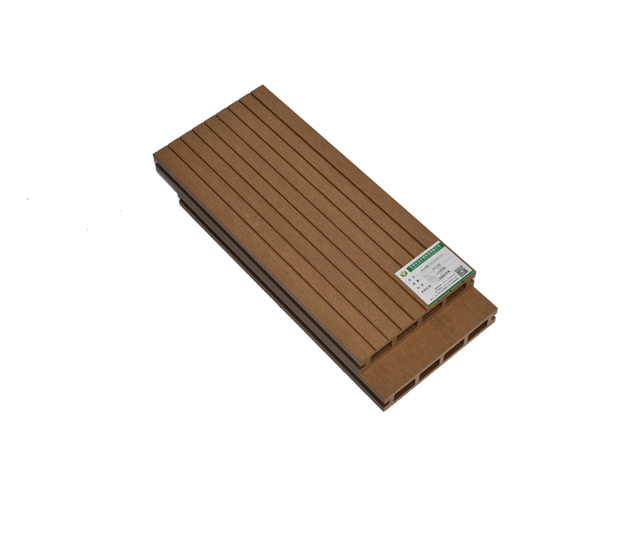
| Hollow single grooveYD140H25 | ||||||||||||||||||||||
 |
||||||||||||||||||||||
| product description | ||||||||||||||||||||||
|
Yida Wood-plastic wood-plastic composite material is made of natural wood (about 60%), plastic (about 30%), mainly polyethylene (HDPE) or polypropylene (PP), and then added necessary chemical aids. Agents, such as antioxidants, lubricants, colorants, UV absorbers, etc... (about 10%). Extruded by professional wood-plastic extrusion equipment under high temperature and high pressure, because of the natural texture and performance, better UV (ultraviolet) performance and lower thermal expansion and contraction. Features
1, colorful, many colors available for selection. Both natural wood texture and wood texture, but also according to their own personality to customize the desired color. 2, waterproof, moisture-proof. It fundamentally solves the problem that wood products are easily rotted and swelled after moisture absorption in humid and multi-water environments. 3, pest control, prevent termites, effectively eliminate pest harassment, extend the service life. 4, high fire resistance. Can effectively flame-retardant, fire rating reached B1 level, self-extinguishment in the event of fire, does not produce any toxic gases. 5, no cracking, no expansion, no deformation, no maintenance and maintenance, easy to clean, save the cost of post-maintenance and maintenance, service life is 10 times that of ordinary wood, is an alternative to outdoor wood. 6, strong plasticity, can be very simple to achieve personalized modeling, fully reflects the personality style. 7, has a high degree of environmental protection Where are the advantages of choosing Yida Wood Plastics? 1, the real factory direct sales, save the price difference between any middlemen. (You can watch the factory at any time) 2, export quality, quality assurance, affordable 3, absolute professional custom size, color, etc. 4, have high-quality technical guidance and construction team to protect your after-sales service 5. The company has a large team and can undertake large and small engineering materials, construction and other services. First-class team, first-class service, Yida Wood Plastic contributes to your success, escort! Floor application area General use for balconies, corridors, courtyards, terraces, gardens, gardens, etc. |
||||||||||||||||||||||
| Product parameters | ||||||||||||||||||||||
|
||||||||||||||||||||||
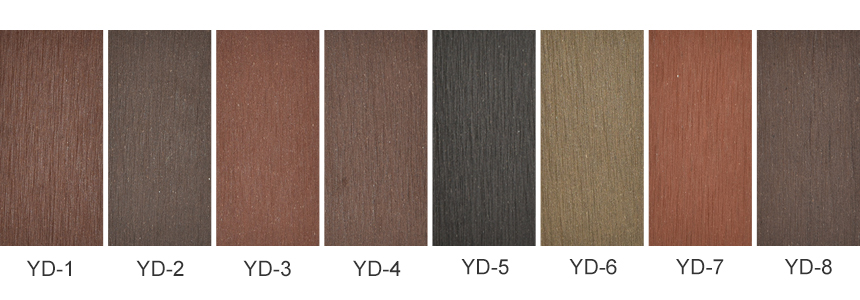
| Color card color selection | ||||||||||||||||||||||
 |
||||||||||||||||||||||
| Required materials and auxiliary materials | ||||||||||||||||||||||
|
1, supporting keel optional 40*25mm 40x30mm 57*32mm 40*40mm 48*48mm solid keel 2, accessories: plastic fasteners + screws stainless steel accessories + screws 3, Edge 45x45mm "L" edge sealing; |
||||||||||||||||||||||
| Construction Installation Technical Guide | ||||||||||||||||||||||
|
First, installation and preparation Construction Site Preparation: Grassroots Clearance, Line Leveling Commonly used woodworking tools are also suitable for most constructions of wood-plastic flooring. The following are the tools required for paving wood flooring:
1. Circular sawing machine (function: cutting wood-plastic floor or keel); 2, portable stone cutting machine (function: removable cutting and paving the end of the floor so that it is neat); 3, hand drill with straight bang twist drill (function: pre-drilled guide hole); 4. Hand drill with cross head (function: also known as electric screwdriver, used for countersunk hole and tighten or remove screws, preferably with torque); 5, level ruler, line, spirit level (measure keel flatness); 6, hammer, carpentry square, tape measure; 7, carpenter's pencil; 8, ink fountain (or powder line). 9, electric impact drill (action: playing plastic expansion pipe drilling hole) Second, the installation steps Keel installation: 1, determine the installation of the first keel position (in the construction process must wear protective glasses to prevent excessive force during the installation process or explosion of the expansion tube and other materials and tools caused by splashing on the eye damage to the glasses)
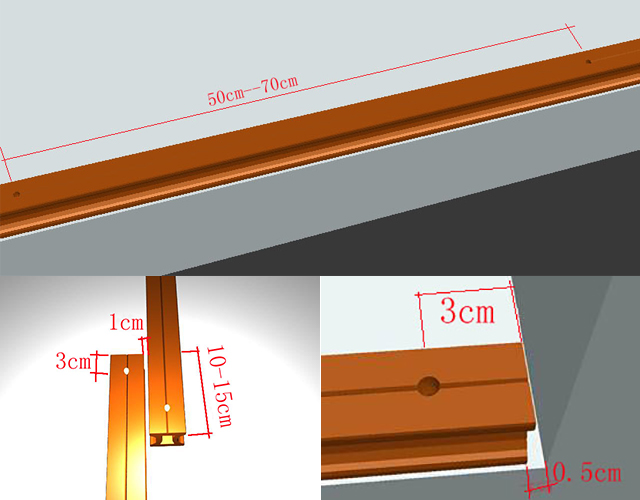
2. Place the first keel drilled with an electric drilling machine, with a hole spacing of 50cm------70cm and a hole position of the center of the keel width, and drill hole specification at both ends of the keel ( For 3 cm, the distance between the left and right keel is 1 cm, and the distance between the keel is 10-15 cm. If the end of the keel is in contact with the wall, the distance between the keel and the wall should also be 0.5-1 cm.) (Note: The hole diameter should be the same as the floor contact surface.) The head diameter and depth of the deep-in and deep-expansion tube must be deep enough to avoid deepening of the stability due to the lack of a fixed bearing surface due to excessive depth.
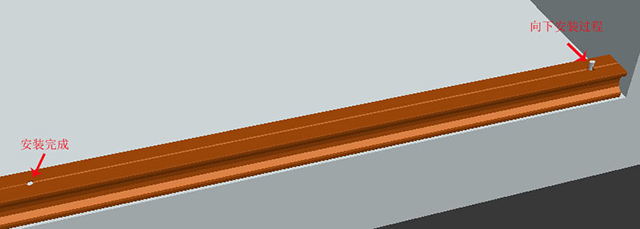
3. Use an electric drilling machine to hit the expansion pipe (and make the diameter and depth of the hole before the expansion pipe head submerge, parallel to the keel, or slightly below the keel)
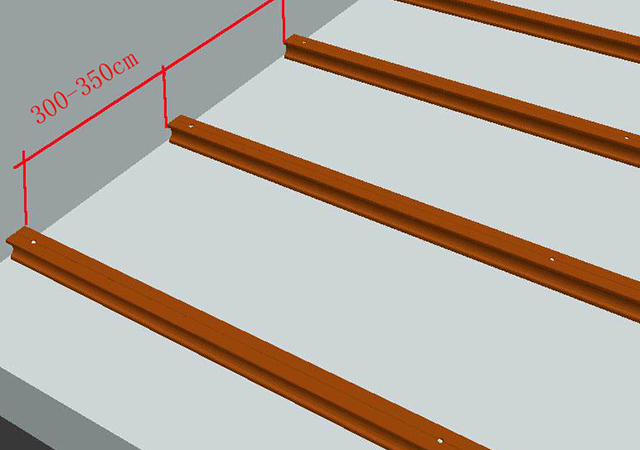
4, in accordance with the above method to install all the remaining keel spacing 300cm ------ 350cm (pay attention to protect the keel to complete the installation, to avoid the unintentional destruction of the construction process caused by quality problems)
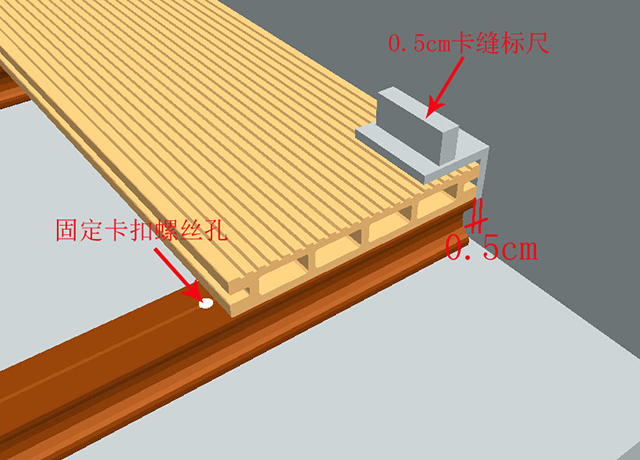
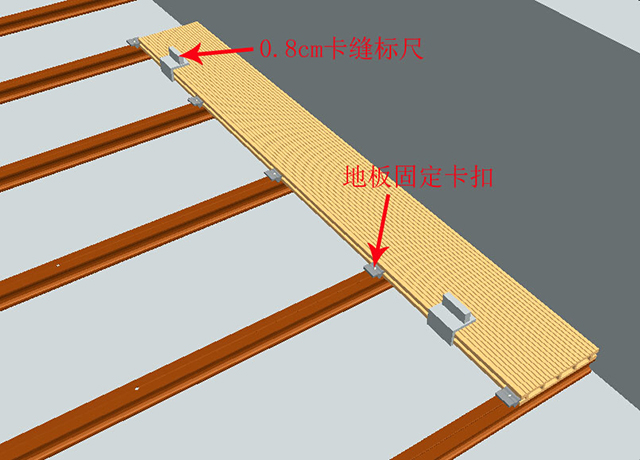
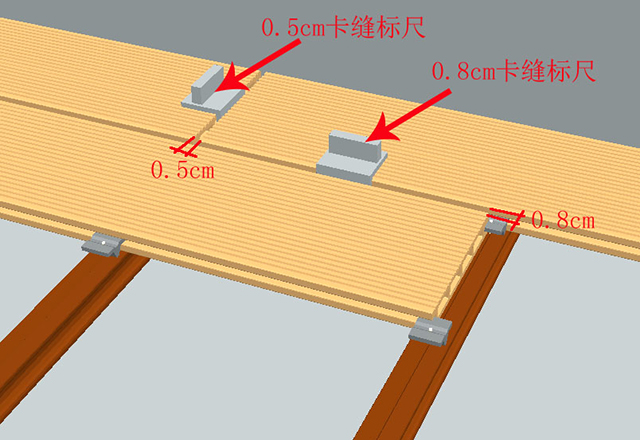
5. Determine the location of the first floor to be installed (with a distance of 0.5cm from the wall surface) and use a uniform and accurate fixed position of the card joint ruler. And more floor width measurement or placement of floor fasteners. Drill fasteners to install the fixing screws.
6. Place the stainless steel set screw and use an electric drill to drill 80% of the length of the screw to adjust and place the second floor.
7. Use the (5) installation method to continue to install the second floor after positioning with the electric drill 100% fastening (6) fixed stainless steel screws. (Note: The gap between the second board and the first board is 8mm reserved)
8, according to (5), (6), (7) method to complete the installation and finished product protection.
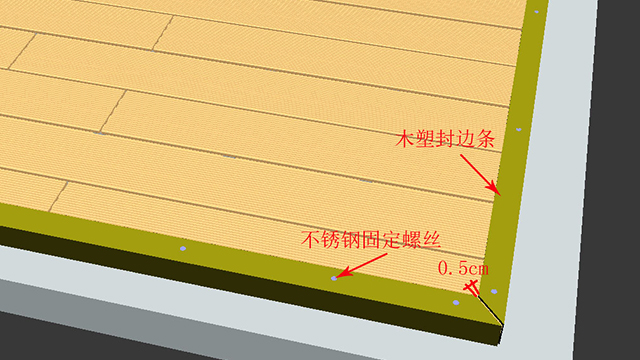
9. Place the edge strips (the interface is bevelled at an angle of 45 degrees and the edge strip profile is 0.5 cm apart), and hit the stainless steel set screw.
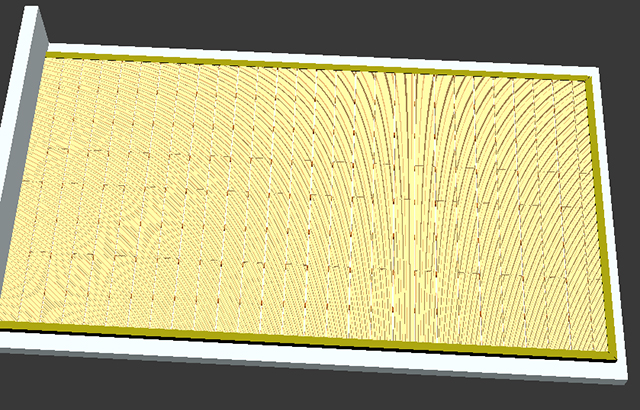
10, installation completed renderings
11, after the completion of the overall installation, check and adjust, and clean up the garbage left over from the surface due to construction or other reasons. Note: This installation specification is prepared in accordance with the current installation specifications for the wood-plastic flooring industry. If there is a conflict with certain aspects of the installation specifications established by the current industry or a certain region, then the industry standards and the standards established by the regional countries shall prevail. The customer should install it on your own. Please ensure that the foundation on which the equipment is installed is securely grounded. Strictly install this installation guide to install the floor. Because the foundation on the ground is not strong or is not properly installed according to the installation guide, the consequences of the output are the responsibility of the customer.
|
||||||||||||||||||||||
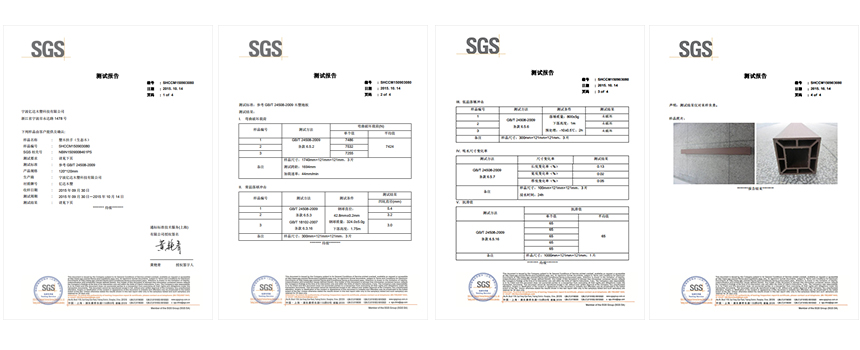
| Inspection Report | ||||||||||||||||||||||
 |